We have all had it, you are cruising down a run when suddenly it starts to flatten out. Your skis or snowboard start to stick, and you lose all your speed ending in an exhausting push, scoot or even sometimes an embarrassing walk out. The last thing you want after an epic days riding. If this is the case, then it’s probably time to get your kit serviced. Doing this at a shop in resort or even at a shop in the UK can cost an absolute fortune especially if you have all the family’s gear to do. For just a small initial investment on a servicing kit and some of your time you can easily service your own skis or snowboard, saving a lot of money and time when you arrive in resort. Below is our guide on how to service your own gear.

WARNING- We highly recommend you do this outside or in an area where the floor does not matter. Getting wax on laminate floors or carpet can cause damage and staining which will not go down well with your parents or partner.
How Often-
This depends on quite a few factors such as the snow conditions and the base structure of your board. Personally, I will give my stuff a service every time before I go away and it will last for up to a 2-week trip. You can get some rub on wax or paste wax witch we will discuss later, than can help to keep your skis or board sliding nicely. However, giving your kit a full service probably isn’t required on day 3 of your trip.
Setting Up-
If you are servicing a snowboard the 1st thing you need to do is take the bindings off. When you do this, we highly recommend you take note of the position of your bindings so you can easily put them back on in exactly the same place.
With Skis we DO NOT Recommend you removing the bindings. Instead you just need to get the brakes out of the way so you can easily work on the base and edges. To do this you will need a heavy-duty elastic band which is available in the servicing kits. Attach the band to 1 brake then over the top of the ski and rear part of the binding, then on to the other brake which will hold them out of the way whilst you work.
You can get specific vices designed for holding skis and snowboards which will attach to a table or workbench. Although these will make your life a lot easier they are not 100% necessary and the servicing process can be done without them.
Now you’re ready to start the service.
Nice sharp edges will help your riding massively and its very easy to achieve with an edge tuner tool
1st of all most edge tuners come with at least a couple of angle option. 90 degrees is the standard for beginners and provides a catch free ride whilst using a lower degree will give you a stronger edge hold great for carving on the corduroy.
Get your skis or board on their side and run the edge tuner all the way along the metal rail between the 2 widest points in the correct direction of the tuner (this will be marked with an arrow) several times till you have a nice sharp edge. A good way to test this is to rub fingernail on the edge if starts to scrape your nail its sharp.

If you have a libtech, Gnu or Roxy snowboard with magnatraction sides this will be a lot easier with the mini edge tuner.
A great technique for people who are new to tuning their edges is to get a marker pen and draw a line the whole way along your edge. After sharpening if this whole line is gone your entire edge is sharpened.
You can file your edges at the tip and tail of the board or skis. Take the file from your tuning kite and gently file the metal edge so it isn’t as sharp. It is best to do this outside of the contact points. This will mean these points are less likely to catch.

Finally, you can polish you edges using the edge rubber from your tuning kit. This isn’t essential to the service process however if you have any rust on your edges this will clean them up making them look like they have come straight out of the factory.

This is a very easy process but is vital to help the new wax soak into your base. Poor a small amount of base cleaner onto the base and using a scotch pad which will be in your tuning kit or easily bought from any supermarket to rub over the entire base. This will remove any old wax and dirt from the base. If the bases is really dirty you can use a brass tuning brush.
At some point you will hit your board on something like a rock sitting on the snow that you either don’t see or can’t avoid. When this happens, you don’t need to worry as it is very easy to fix and holes or deep scrapes on your base. If it is just a superficial scrape you don’t need to worry as this will be filled during the waxing however if its deeper than around 3mm you can easily fix this with P-Tex.

Take your P-Tex Candle and light the end using a lighter (Turbo lighters work best). Once it starts to melt it will start dripping. Discards the first couple of drips as this can be burnt especially if using clear P-Tex then allow the P-Tex to drip into the hole on your base until its completely full and slightly proud of the surface.
Once the P-Tex is dry (best to leave for around 10 mins) take the metal scraper from your tuning kit and scrape the excess of so the repair is flush with the rest of the base. It’s as easy as that.
P-Tex comes in both the super tune and deluxe tune kits and is available separately.

There are thousands of different waxes on the market and really this is just a preference. Initially I would recommend going for an all temperature wax however if you are going somewhere very cold or late in season you can get wax’s suited to those conditions. If you are riding a Bataleon snowboard with triple base technology Bataleon have created a wax that comes in 2 types for you central and side base. This is due to the different base angles causing a different friction value. However, a good all temp wax will do the job just as well.

tuning iron to the correct temperature. This temperature varies depending on the wax however the packaging should tell you what to set the iron at. Start by holding the block of wax on your tuning iron. It will start to melt and drip from the iron. Start by dripping the wax all the way around the edge of you base and then for a ski do one line up the middle and for a snowboard do 2-3 passes. This is not an exact science and the amount of wax needed can vary depending on how dried out your base is.
Now you need to spread wax out over the entire base. Use small circular motions allowing the wax to spread evenly without staying in 1 area to long. If the wax is taking more than a few seconds to dry after you have run the iron over it, you have spent a little bit too long in that area. Move along to another area and you can always come back to that area if you need to continue spreading the wax. Once the wax is evenly spread you are done. With this stage of the servicing.

Now all you need to do is let it cool down. Its best to do this for at least 30 mins but if you can leave it a bit longer then even better. Even overnight is fine.

Again, this is a very easy process even if it can be a bit hard work. Take your plastic scraper which also come in the tuning kit and angle it at about 45 degrees push hard and scrap along the base of the board. It is best to do this tip to tail just like we did with the edge tuning.
Continue this process until there is no visible wax on the base and it is nice and smooth. I know this can feel like we are just undoing the last step of this process however the wax we want is what has soaked into your base. Leaving too much wax on the base can cause your skis or snowboard to become sticky.
At this point it’s a good time to see if the amount of wax you have used was correct. If you find you are scraping a lot of wax off, then you have used too much or if you are scraping very little you haven’t used enough.
Make sure you scrape any wax of the metal edges too as this will stop you from holding a nice edge.

Structure the base-
Take the Nylon brush from your tuning kit and give you board or skis a few hard brushes and in the direction of tip to tail. This helps to structure the base of the board and even up the scraping of the board. This process will help prevent the board from sticking to the snow and allow it to glide nice and smoothly.
Following this take the a new scotch pad, ideally one that is not too course (we don’t recommend using the one you used with base cleaner as this will remove the wax you just put on) and in the same motion tip to tail rub down the base giving you a lovely finish like it was brand new
The final step which is not even required is to take a soft dry cloth and just give your base a bit of a wipe down. The structuring will create a bit of bust and this will just clean it up and make it nice and shiny.
Remove the rubber bands from your skis or put your bindings back on your snowboard and you are all done. How easy was that.
Paste and Rub on Waxes
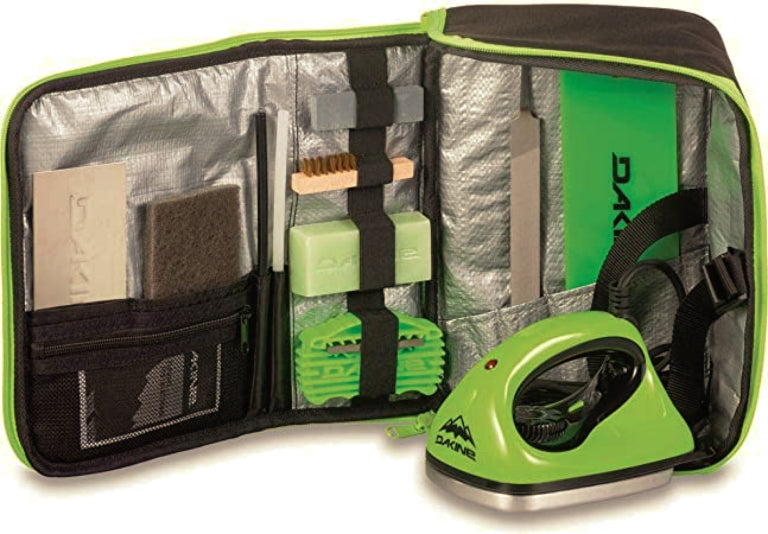
these can be a really good option if you are on a long trip or just feel like you need to add a bit of extra wax to your board but don’t want to bother with an entire service. Products like the Dakine Paste Wax and Dakine High Octane rub on wax are very easy to apply and do not require an iron or a scraper.
Storage wax
If you know you are not going to be using your kit, then a storage wax is a good idea. Over a period of time of no use or servicing the base can dry out which is not great for your expensive kit. Apply the steps discussed as above until you get to the scraping part. One this is done you can store your board and complete the final steps when you are ready to use it again.

I hope this blog has explained how easy the servicing process can be and will save you some money in the future. If you have any questions regarding any of the equipment we have mentioned above or the process please feel free to contact the S2AS team on 01202 738448, through our website s2as.com, Facebook or Instagram.

If you don’t fancy trying out your own servicing, we can do this in store for you.